Install a few hours before your journey and activate during your flight or once you arrive.

Scan the QR code sent by email, then enable the plan when you’re ready to travel.
Prepare in advance by adding your eSIM, and switch it on at your destination for instant service.
Have the QR code open on another screen or device to scan with your phone.
Make sure your internet connection is stable during the process.
Each QR code can only be scanned once.
Do not delete the eSIM profile from your device, as it cannot be reused.
Manual activation codes can only be entered once.
Ensure you have a strong and stable internet connection during setup.
Do not delete the eSIM profile from your device, as it cannot be reinstalled.
Check the email we sent containing the SM-DP+ address and the Activation Code. Keep them ready to begin the setup.
We also send the codes via SMS.
Didn’t get the codes? Contact our support team.
Go to Mobile Data, tap Add eSIM or Add Data Plan, then choose Enter Details Manually.
On the manual entry screen, type in the details provided in your email and follow the steps shown on your device.
Make sure you are at the destination where your eSIM plan is valid.
Download this guide as a PDF so you can follow the steps even without internet.
Keep the instructions handy before you travel to avoid issues when offline.
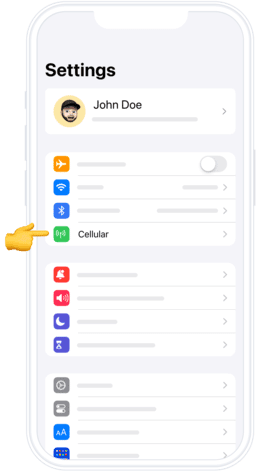
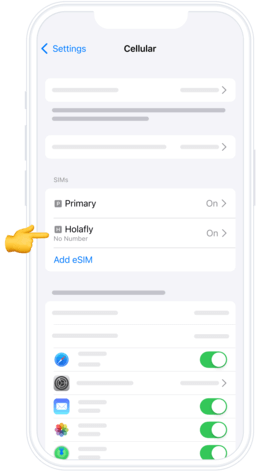
Open Settings on your iPhone and tap Mobile Data.
Select the SwiftySim plan from the list of available SIMs.
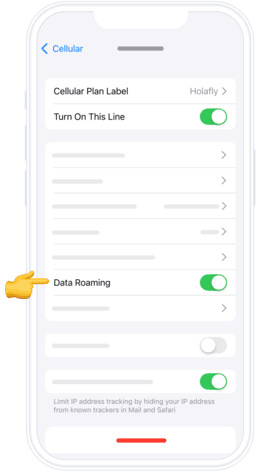
Scroll down and enable Data Roaming to activate your connection.
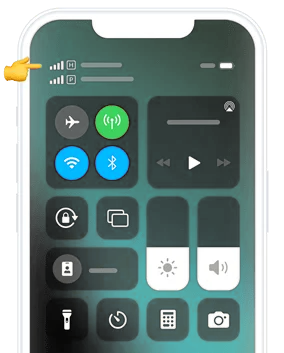
Check in two simple ways:
Ensure you see at least one signal bar on your phone’s status bar.
Go to Settings > Mobile Data, select your SwiftySim plan, and make sure Data Roaming is switched on.
If you have any doubts during setup, our team is available 24/7 through live chat to guide you every step of the way.